
|
|
Vulkan KomputeThe General Purpose Vulkan Compute Framework. |
| Full Vulkan Components | Simplified Kompute Components |
|---|---|
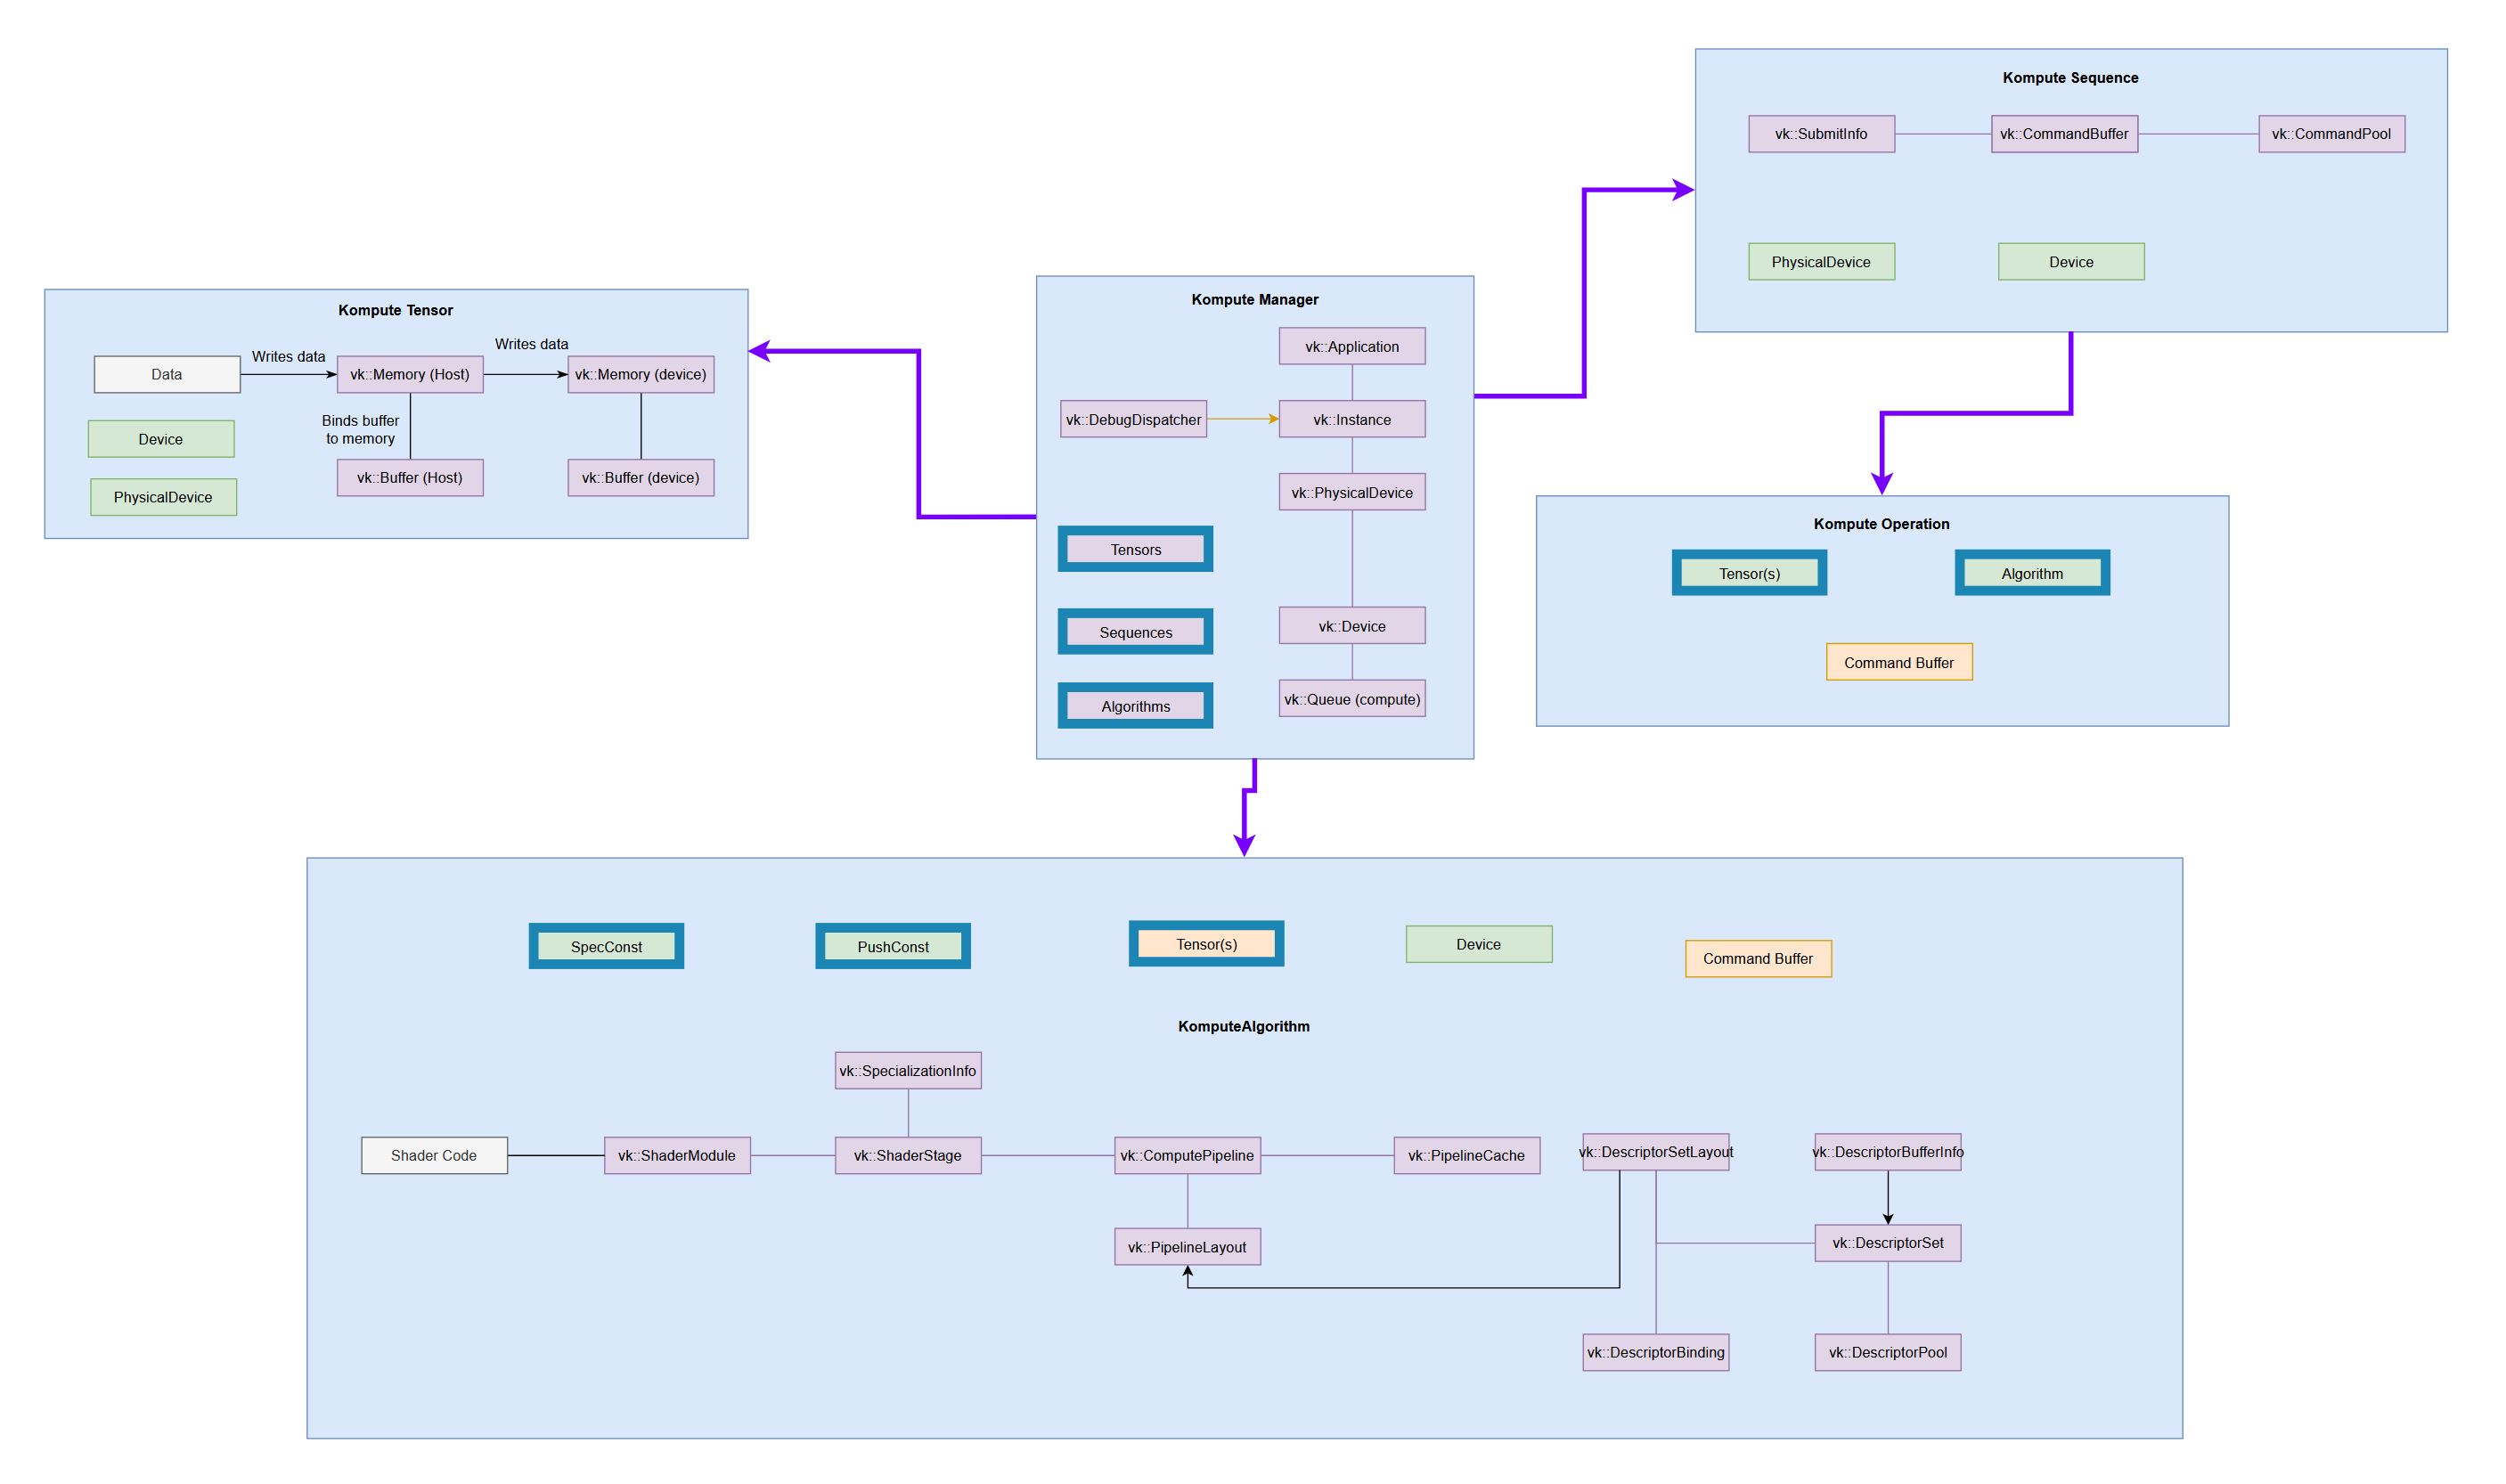
(very tiny, check the full reference diagram in docs for details) 
|
|
|
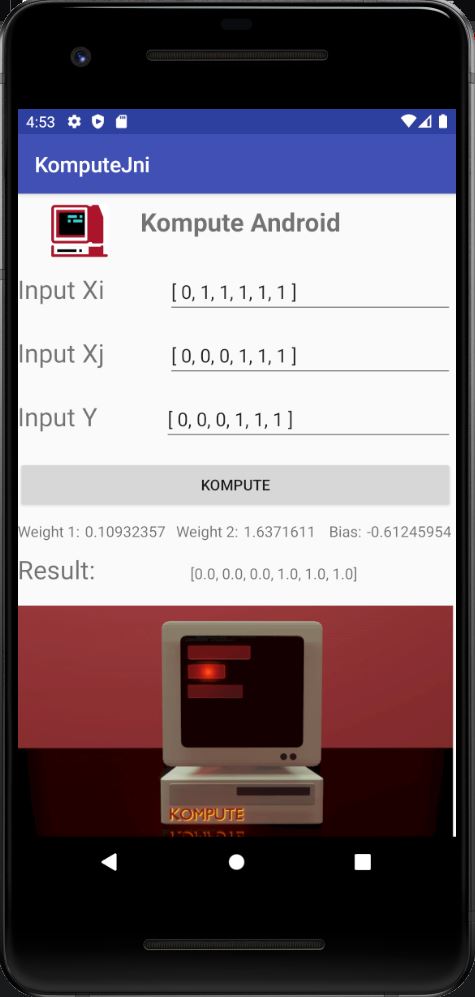
For a full deep dive you can read the blog post "Supercharging your Mobile Apps with On-Device GPU Accelerated Machine Learning". You can also access the end-to-end example code in the repository, which can be run using android studio. 
|
|